Overview
Few pieces of outdoor furniture are as iconic as the Adirondack chair. Instantly recognizable by its wide armrests, slanted back, and deep seat, this chair has been a symbol of relaxation for over a century.
A Chair with a Story
The Adirondack chair traces its roots back to 1903 when Thomas Lee, seeking the perfect outdoor seating for his summer home in the Adirondack Mountains of New York, designed a sturdy and comfortable chair made from a single piece of wood cut into slats. His friend, Harry Bunnell, saw commercial potential and—without Lee’s permission—patented the design in 1905. The rest, as they say, is history (though we’re sure there were some awkward summer BBQs between the two afterward).
Now, if you happen to be Canadian, you might argue this chair isn’t Adirondack at all—it’s a Muskoka chair. Named after Ontario’s cottage country, the Muskoka version is essentially the same but often features slight modifications in design. The battle of Adirondack vs. Muskoka is as intense as the great “soda vs. pop” debate. No matter what you call it, one thing remains true: this chair is the gold standard for lazy afternoons and cold drinks.
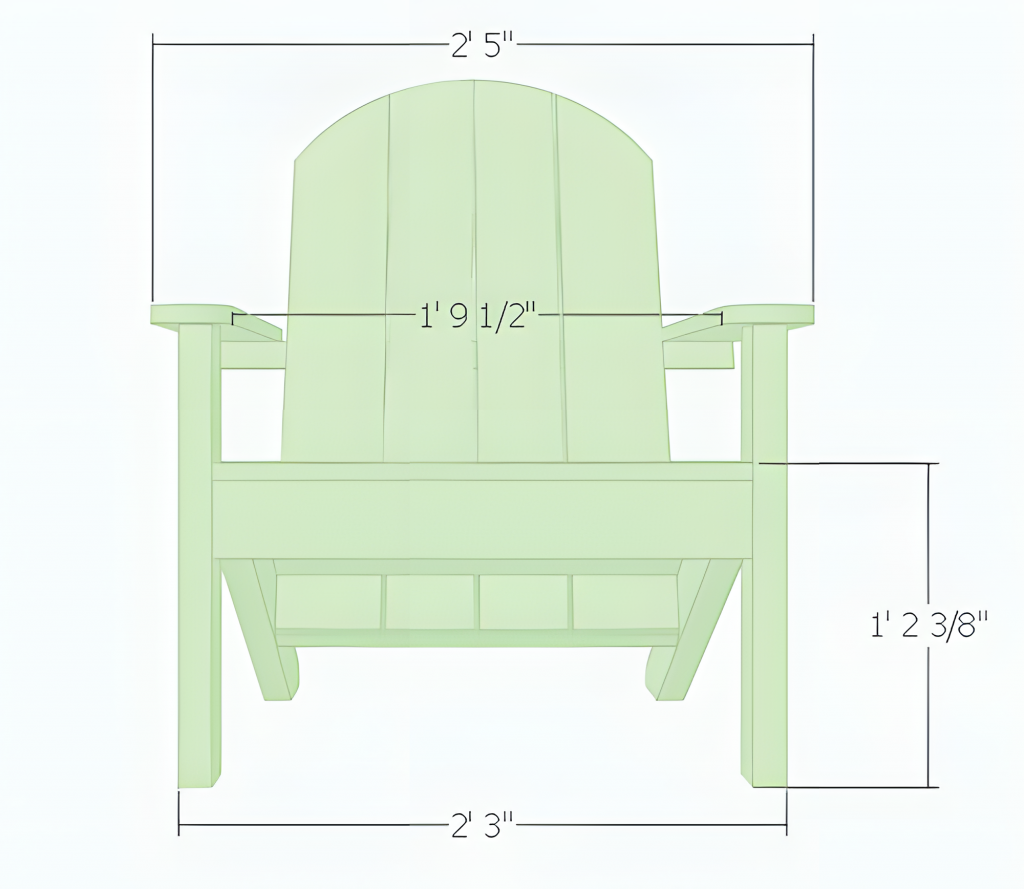
Dimensions
- Standard Adirondack chair size
- Comfortable angled backrest and wide armrests
Materials & Shopping List
Gather the following materials before starting your build:
Lumber:
| Description | Quantity | Size |
|---|---|---|
| (1×6) Back Slats | 1 | 12’ |
| (1×4) Arm, Seat Slats, Front Seat Support, Back Leg Support, Top Back Support | 2 | 10’ |
| (2×4) Leg, Seat Support, Center Back Support, Bottom Back Support | 2 | 8’ |
Hardware:
| Item | Quantity | Size |
| Carriage bolts, nuts, washers | 4 | 3 1/2” |
| Carriage bolts, nuts, washers | 4 | 2 1/2” |
| Exterior Screws | – | 2”, 1 1/4”, 3” |
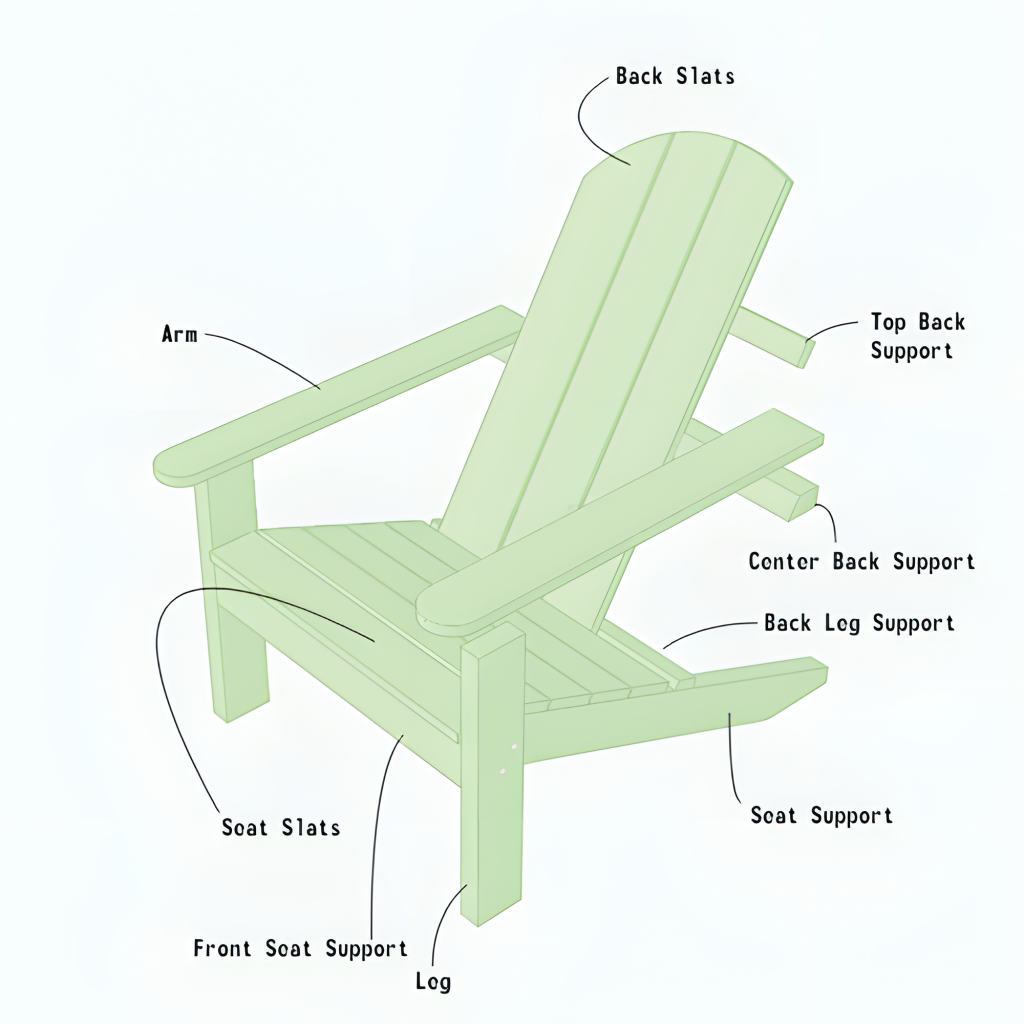
Step-by-Step Instructions
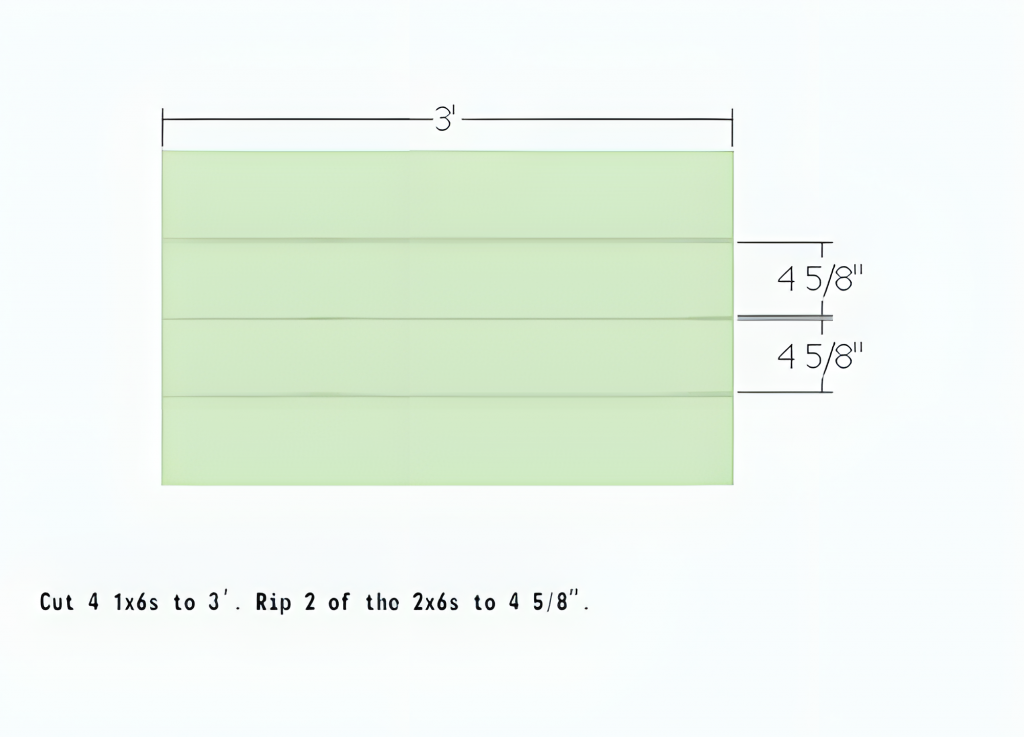
Step 1: Prepare the Wood
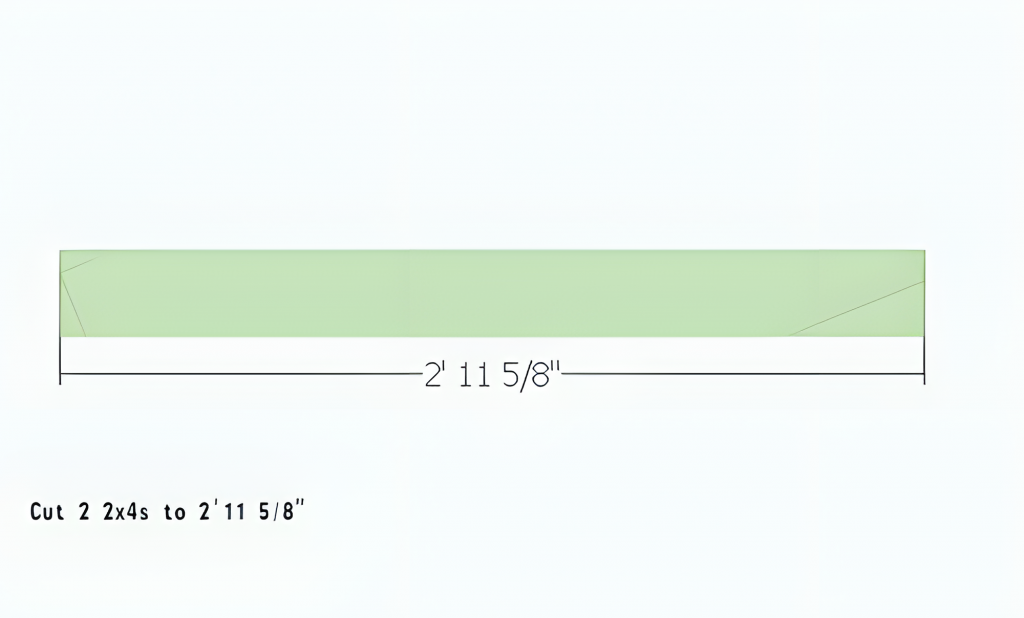
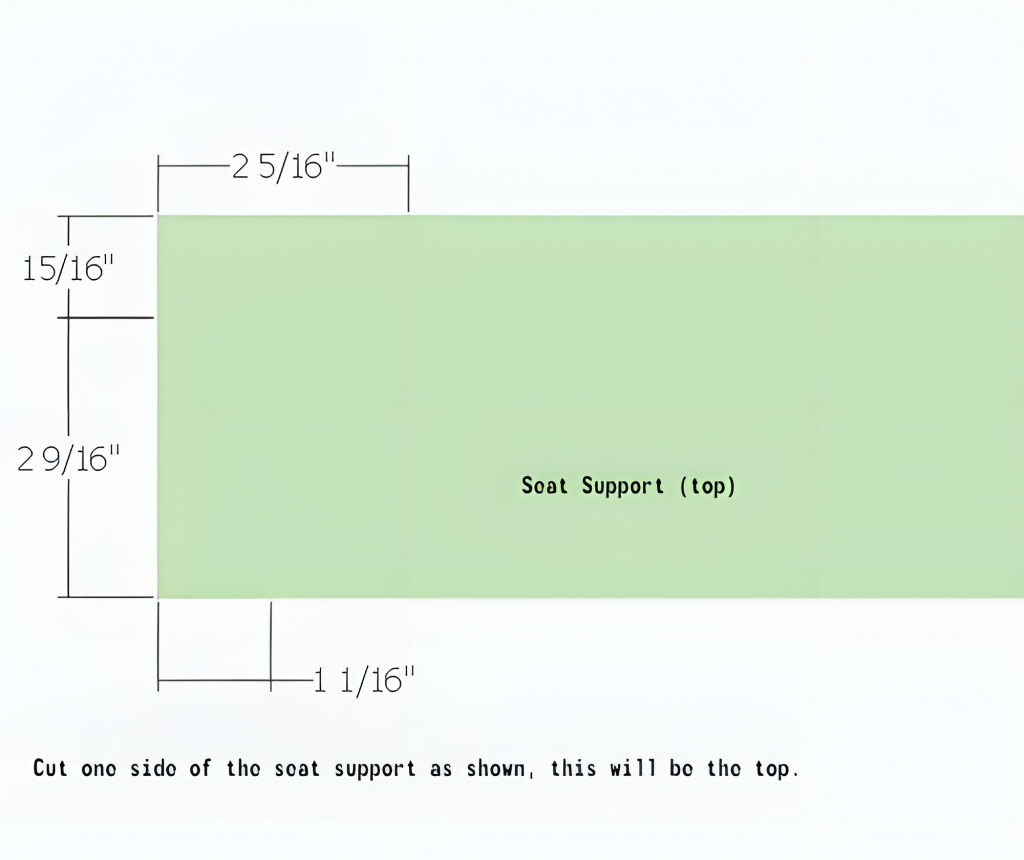
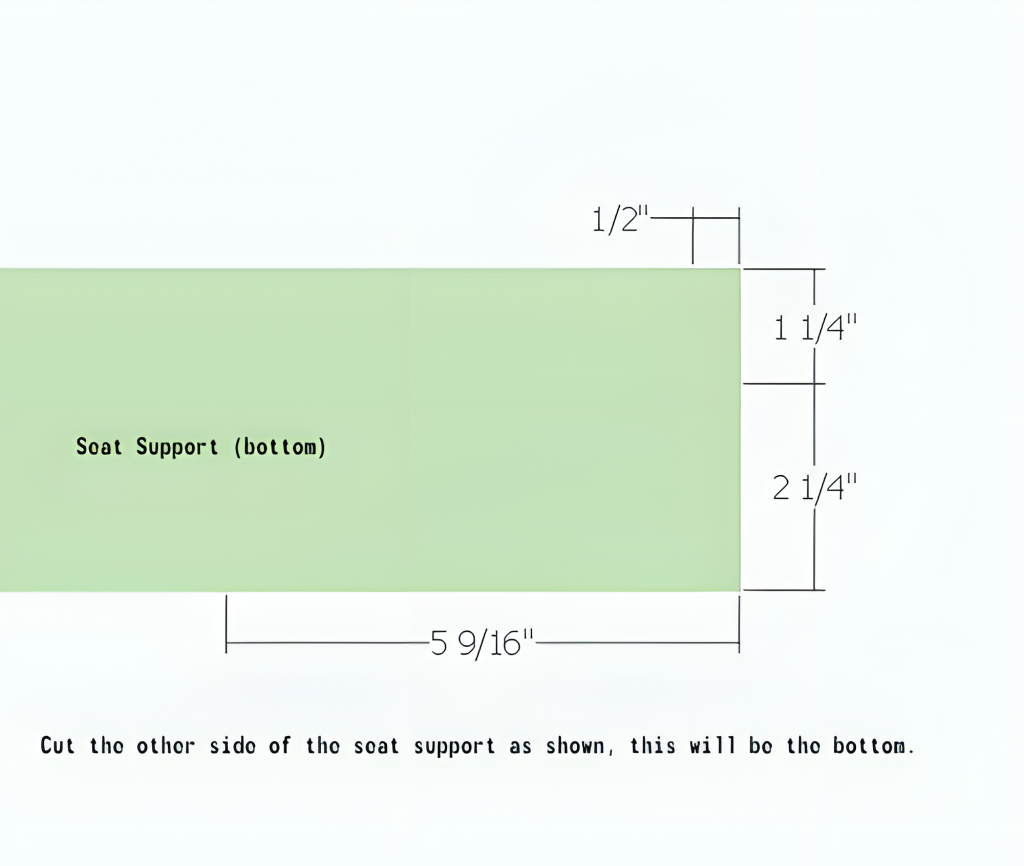
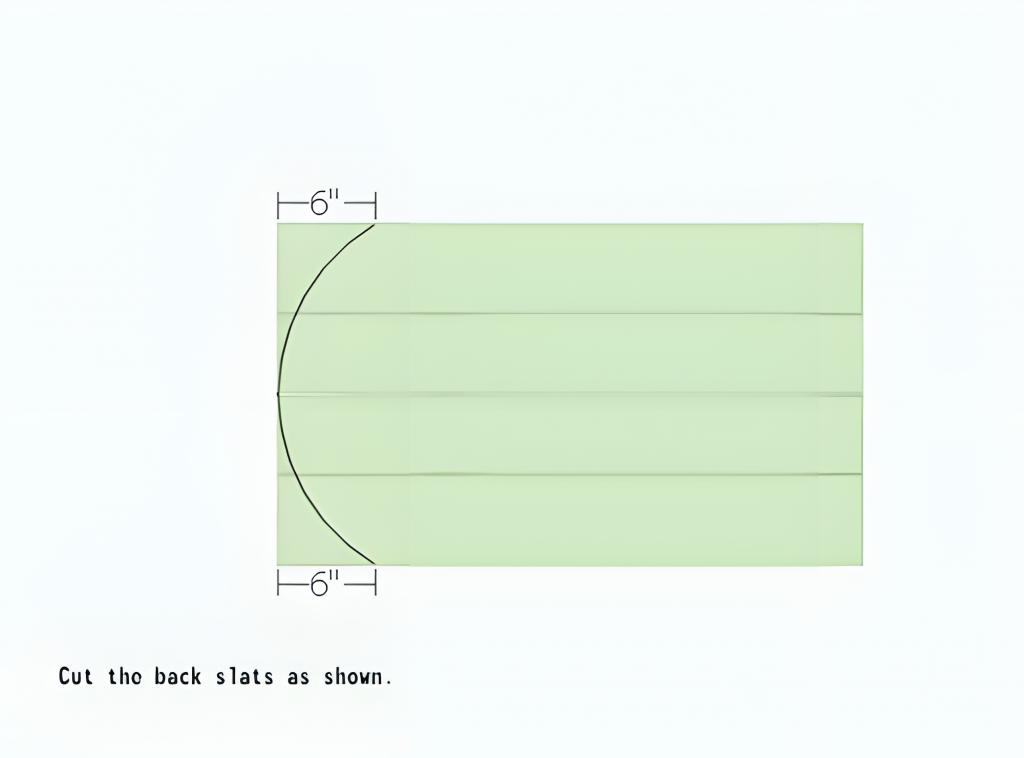
- Cut pieces according to the dimensions provided.
- Sand edges for a smooth finish.
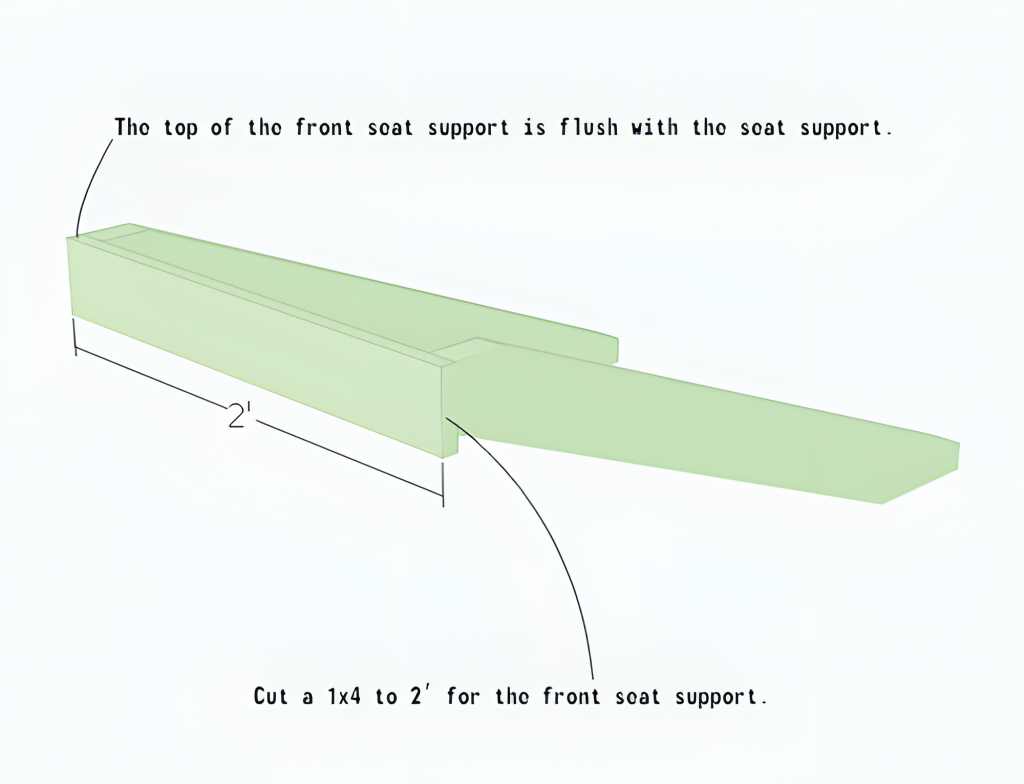
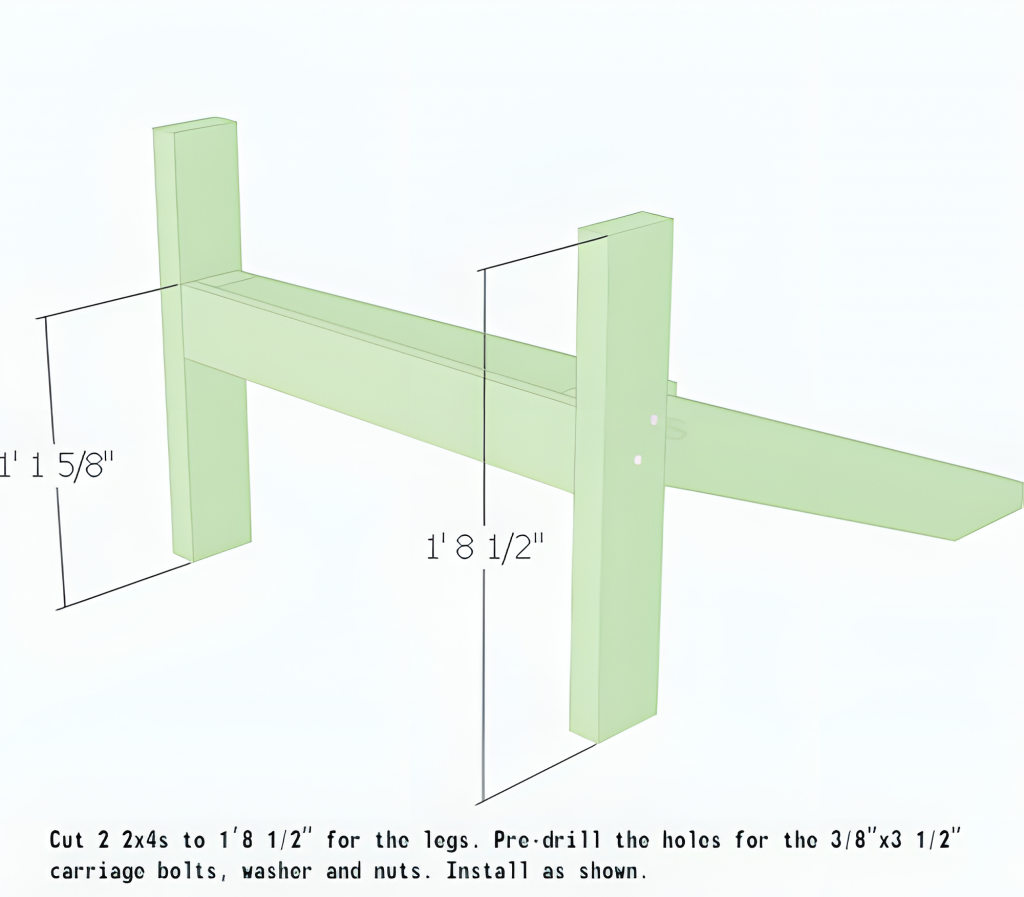
Step 2: Assemble the Legs & Seat Supports
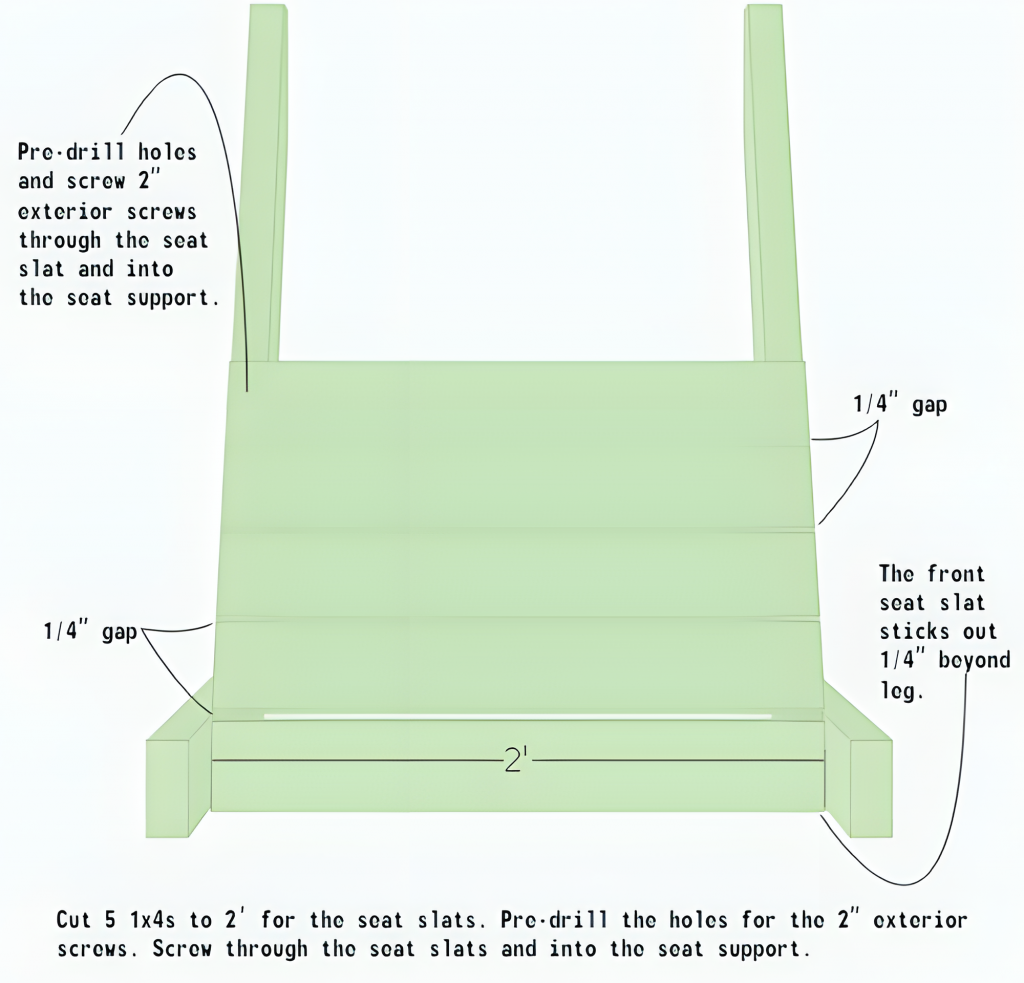
Step 4: Install the Seat Slats
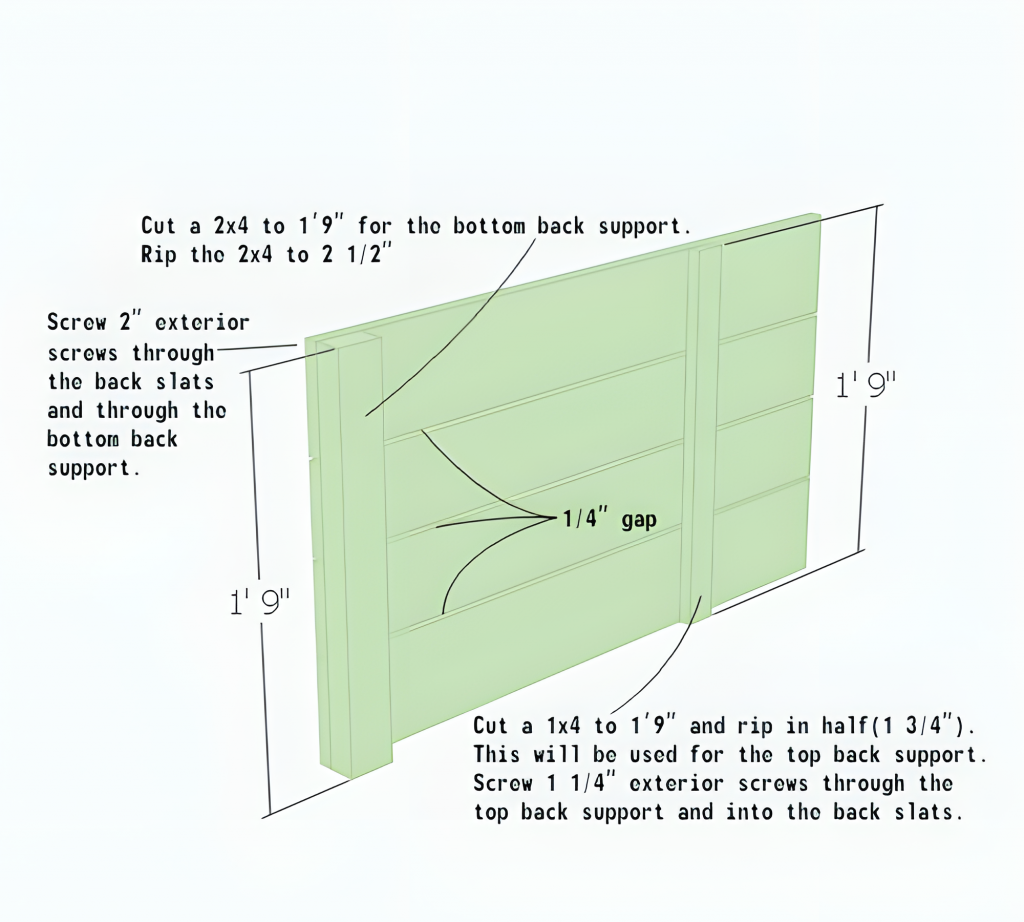
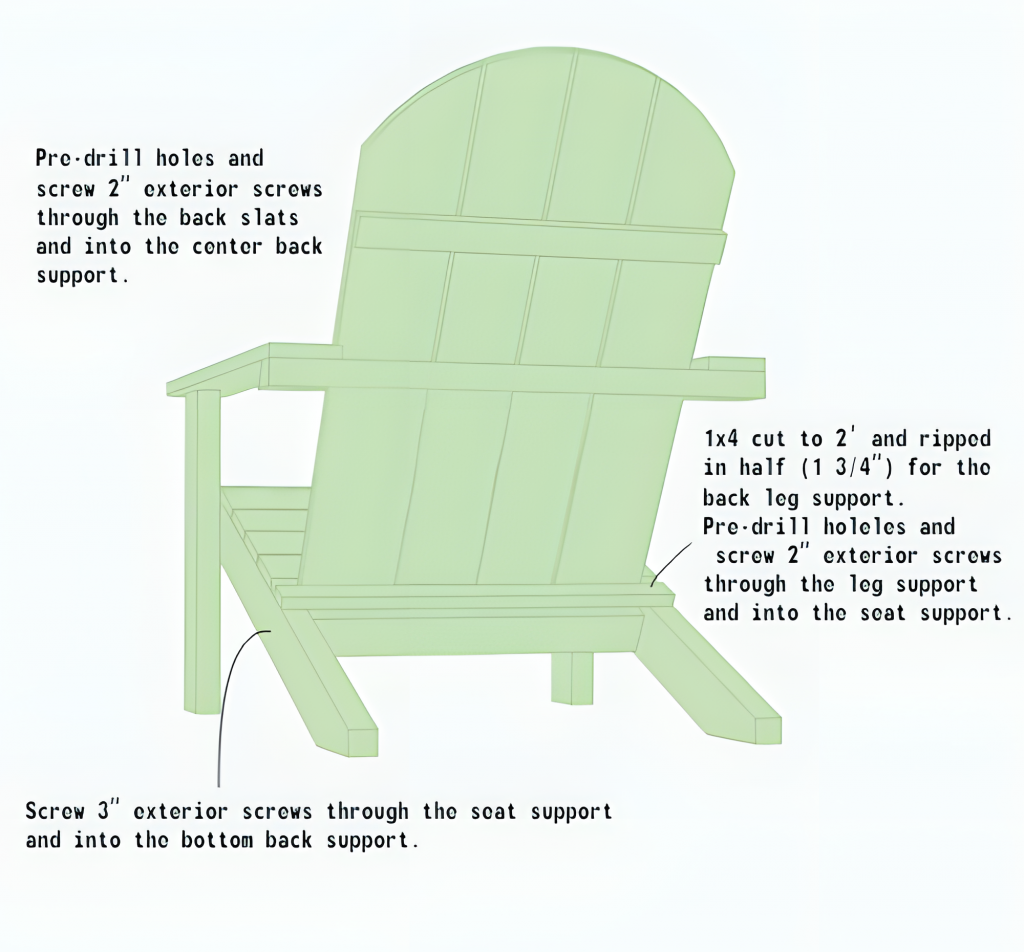
Step 3: Attach the Back Supports And Armrests

Step 7: Final Assembly & Sanding
- Double-check all connections for tightness.
- Sand all surfaces and edges.
- use wood putty to plug holes
- Apply a protective finish such as paint, stain, or sealant.
Finishing Touches
Now that you’ve built your Adirondack chair, it’s time to give it that final touch of perfection. To ensure longevity, apply a high-quality outdoor wood sealant, stain, or paint, depending on your style preference. If you’re aiming for a rustic, natural look, go for a clear sealant that enhances the wood grain. If you’re feeling bold, why not give it a pop of color?
For added comfort, consider cushions or a weather-resistant seat pad—because let’s be honest, once you sit down, you won’t want to get up. If you’re placing the chair on a patio or deck, adding rubber feet can help prevent wear and tear on the legs. Now, step back and admire your craftsmanship.
Congratulations! You’ve just built an Adirondack chair, a timeless symbol of relaxation and craftsmanship. Whether you’re lounging lakeside, basking in the backyard, or claiming the best seat around the campfire, this chair is now your personal throne of leisure.